Full-spectrum LED grow lights work best when you understand what the label actually means, hang them at the right height, run them on a consistent schedule, and match the intensity to what your plants need at each stage of growth. That covers about 90% of what separates thriving indoor plants from ones that stretch, burn, or just sit there doing nothing. This guide walks you through both paths: using a ready-made full-spectrum LED, and building your own from scratch if you want to go the DIY route.
How to Use Full Spectrum Grow Lights for Indoor Plants
Marcus Tillman
24 Mar 2026
What 'Full Spectrum' Actually Means (and What to Look For)
The term 'full spectrum' gets thrown around on every grow light box, but it doesn't have a locked-down technical definition. In practice, it means the light covers a broad range of wavelengths that plants can use, typically stretching from around 400 nm (violet/UV edge) all the way to 700 nm or beyond into far-red territory around 730 nm. A real-world example from horticultural lighting specs often lists discrete peaks at 410 nm (UV), 430 nm, 460 nm (blue), 580 nm, 610 nm, 630 nm, 660 nm (red), and 730 nm (infrared). That spread matters because different wavelengths drive different plant processes: blue light drives compact vegetative growth, red drives flowering, and far-red influences how plants transition between stages. what is the red light for on a grow light
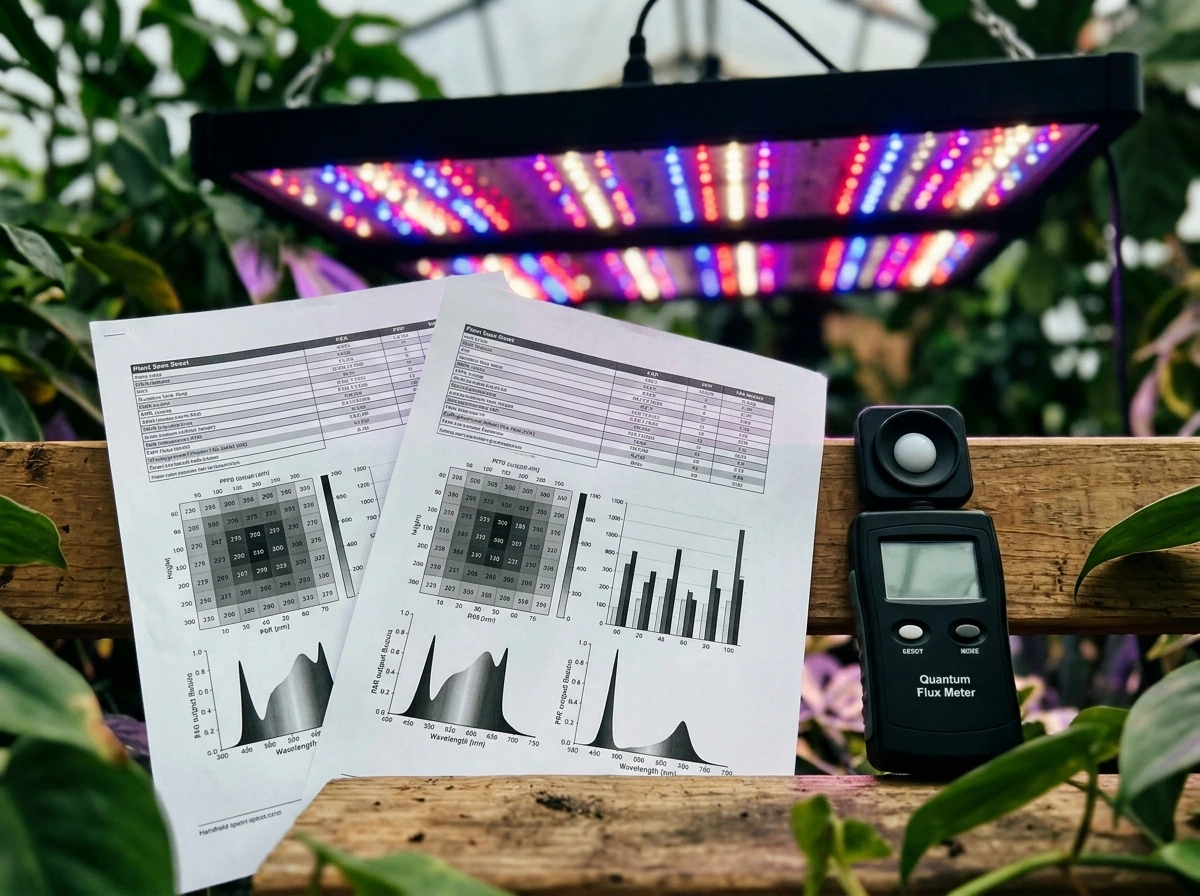
The more meaningful numbers to look for on a spec sheet are PAR, PPF, and PPFD. PAR (photosynthetically active radiation) refers to the 400–700 nm wavelength band that drives photosynthesis. PPF (photosynthetic photon flux) tells you the total photon output of a fixture, measured in micromoles per second (μmol/s). PPFD (photosynthetic photon flux density) is what actually hits your plant's canopy, measured in μmol·m⁻²·s⁻¹. That last number, PPFD, is the one that matters most when you're deciding how high to hang your light or how many fixtures you need.
One thing worth knowing: standard PAR and PPFD calculations only count photons between 400–700 nm. So if a fixture advertises UV or far-red output, those photons won't show up in the PPFD number even if they're genuinely there and useful. A light can be legitimately 'full spectrum' in a broader sense while still having a PPFD spec that only reflects the core 400–700 nm band. When you're shopping, prioritize lights that publish actual PPFD charts at specific hanging distances rather than just claiming 'full spectrum' coverage.
What to Check Before You Buy
- PPFD values at the hanging distances you'll actually use (usually 12–24 inches for most home setups)
- Coverage area at those distances (a 200W panel at 18 inches might only deliver usable light over a 2x2 ft footprint)
- Spectrum chart showing coverage across blue (430–470 nm) and red (620–670 nm) peaks at minimum
- Wattage that reflects actual power draw from the wall, not 'equivalent' marketing wattage
- Passive or active cooling (heatsinks vs. fans), which affects noise and longevity
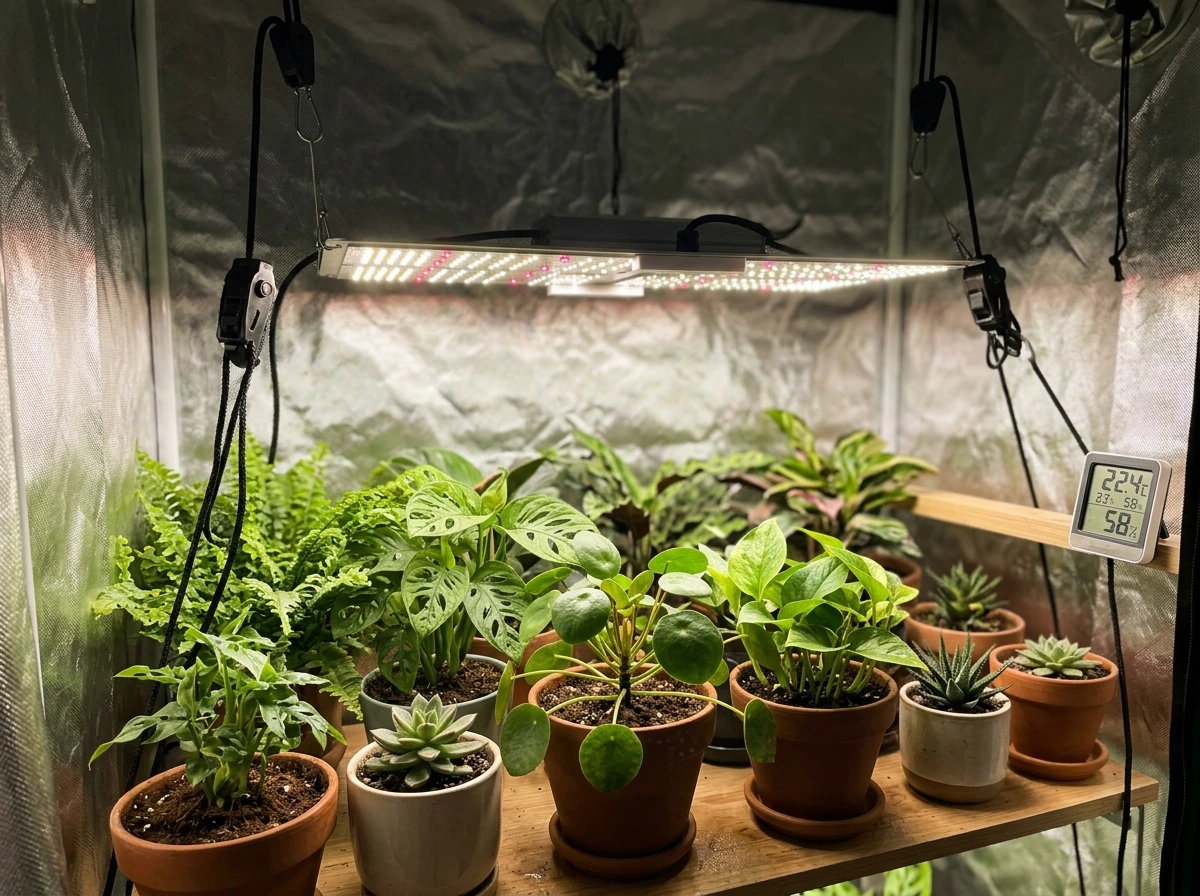
Setting Up and Placing Your Full-Spectrum LED
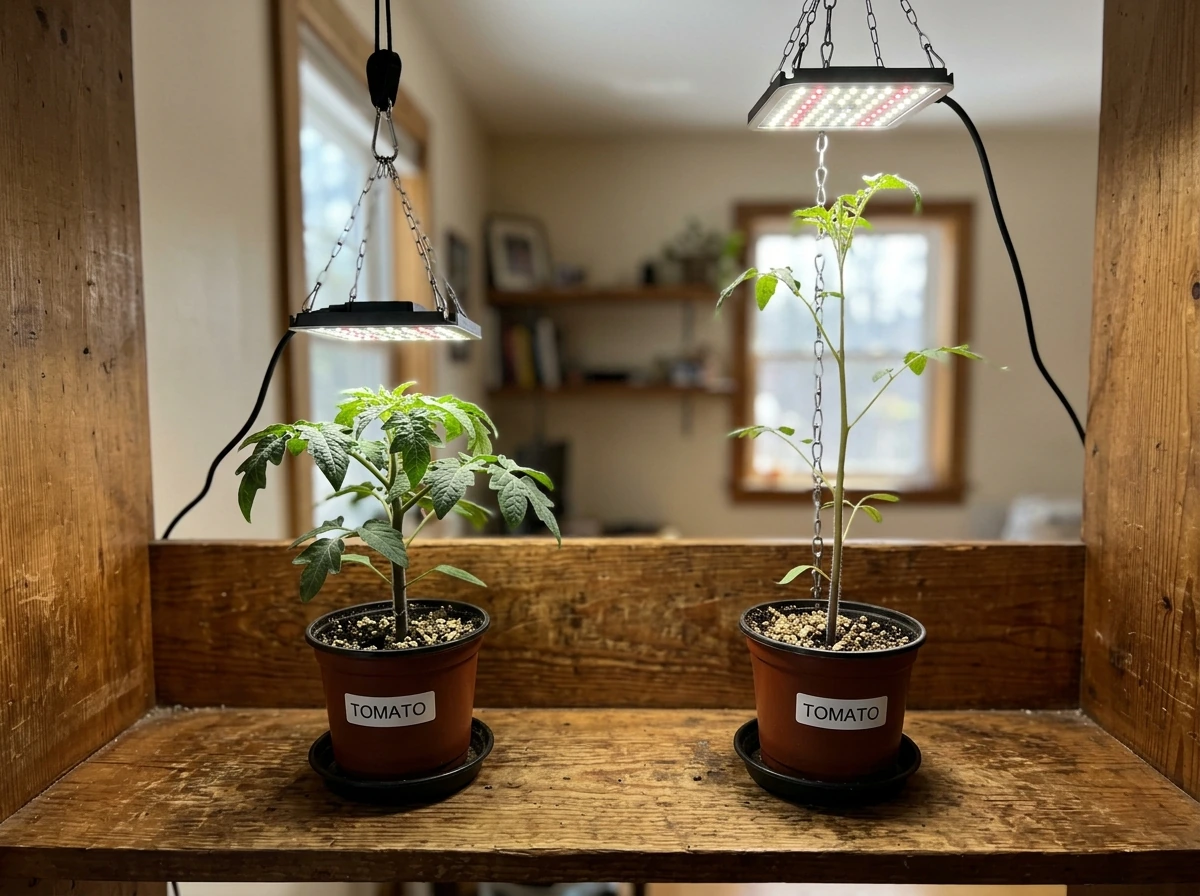
Good placement is the single biggest variable you can control. Most problems I see with indoor grow lights come down to hanging them too high (plants stretch looking for light) or too low (leaves bleach or burn). The goal is getting the right PPFD to the canopy, which means adjusting height based on both your light's output and what your plants need at their current growth stage.
Height and Distance Guidelines
| Plant Type / Stage | Recommended PPFD (μmol·m⁻²·s⁻¹) | Typical Hanging Height |
|---|---|---|
| Seedlings / clones | 100–300 | 24–30 inches above canopy |
| Leafy greens / herbs | 200–400 | 18–24 inches above canopy |
| Vegetative houseplants | 300–600 | 16–22 inches above canopy |
| Fruiting / flowering plants | 600–900 | 12–18 inches above canopy |
| High-light succulents / cacti | 500–800 | 12–18 inches above canopy |
These are starting points, not locked-in rules. Always check your specific fixture's PPFD chart because a 100W budget LED and a 100W quality LED can deliver drastically different numbers at the same height. If your light doesn't come with a PPFD chart, hang it at 24 inches to start, watch your plants for 5–7 days, and adjust from there.
Positioning and Aiming the Light
Panel LEDs and quantum board lights are designed to hang flat and horizontal directly above the canopy for even coverage. Don't tilt them at an angle trying to cover more area, as that just creates hot spots under the center and weak edges. If you have multiple plants spread across a wide shelf, use two smaller lights rather than angling one big one. For narrow vertical setups or vine-type plants, side-lighting with a bar-style LED can supplement overhead coverage and push light into the lower canopy.
Keep reflective surfaces in mind. White walls, white panda film, or Mylar reflective sheeting around your grow area can bounce light back and meaningfully increase the usable light your plants receive without any extra electricity. In a small enclosed tent, this alone can feel like getting 20–30% more out of your fixture.
Powering, Wiring, and Mounting: DIY vs. Ready-Made
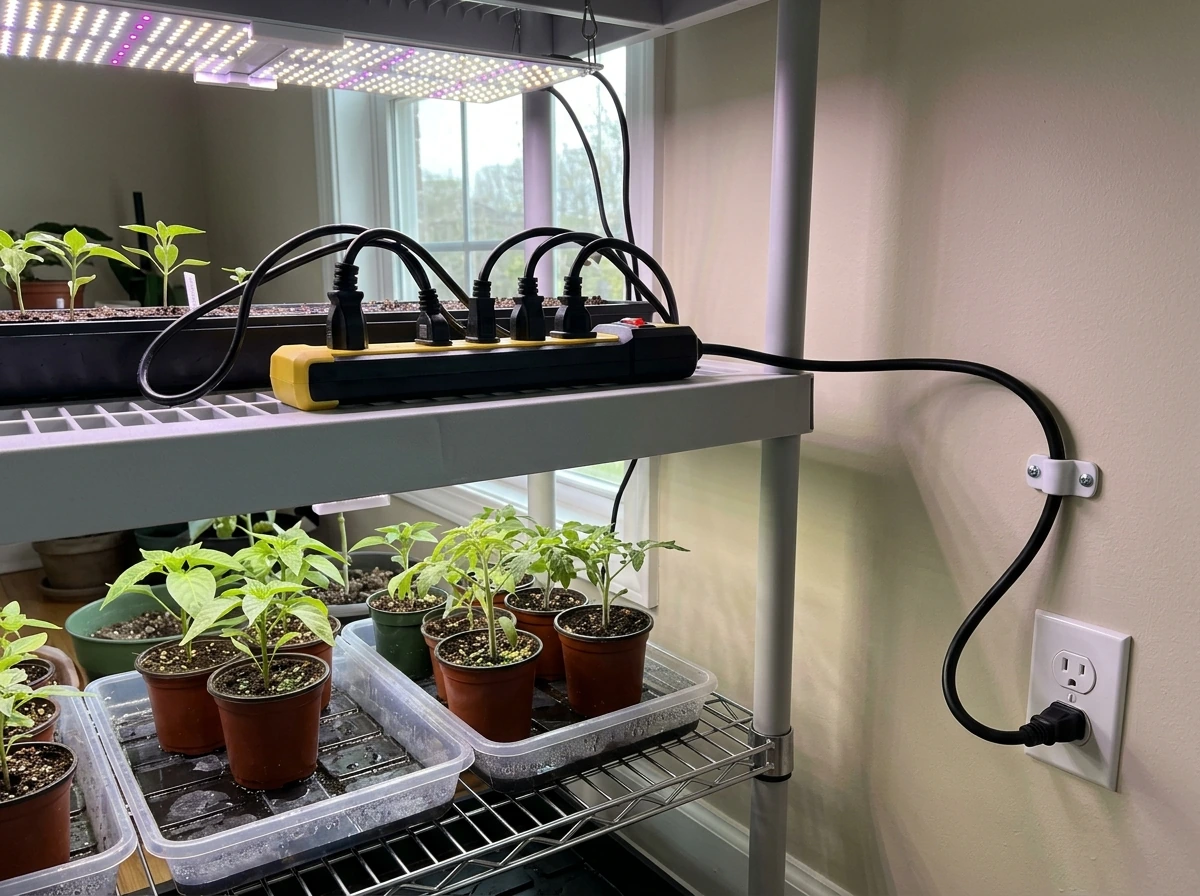
Most commercial full-spectrum LEDs are genuinely plug-and-play. You plug them into a standard 120V outlet (or 240V for larger units), hang them from a ratchet hanger or adjustable rope clip, and you're done. If you're running a grow tent, those ratchet hangers clip onto the tent's top crossbars. For shelf setups, screw-in hooks or wire cable hangers work well. The main thing to check with ready-made lights is that your circuit can handle the load: a 400W LED on a 15-amp circuit is fine, but running multiple high-wattage fixtures plus pumps and fans on the same circuit can trip breakers.
If you want to run multiple lights, a simple power strip with surge protection handles the job. For timing, plug everything into a mechanical or digital outlet timer rather than relying on remembering to flip switches manually. Consistency matters more than perfection with lighting schedules, and a $10 timer solves that problem completely.
Wiring Safety Basics for Any Grow Space
- Use grounded (3-prong) outlets and grounded extension cords rated for the wattage you're running
- Keep all connections away from water, humidity, and wet surfaces; in grow tents, route cords up and out of the watering zone
- Never daisy-chain cheap power strips; use a heavy-duty strip rated for at least 15 amps if you're running multiple fixtures
- If you're in a garage or shed, use GFCI outlets or a GFCI adapter, especially anywhere moisture is present
- Check that your hanging hardware (hooks, hangers, cables) is rated for the weight of your fixture with a safety margin
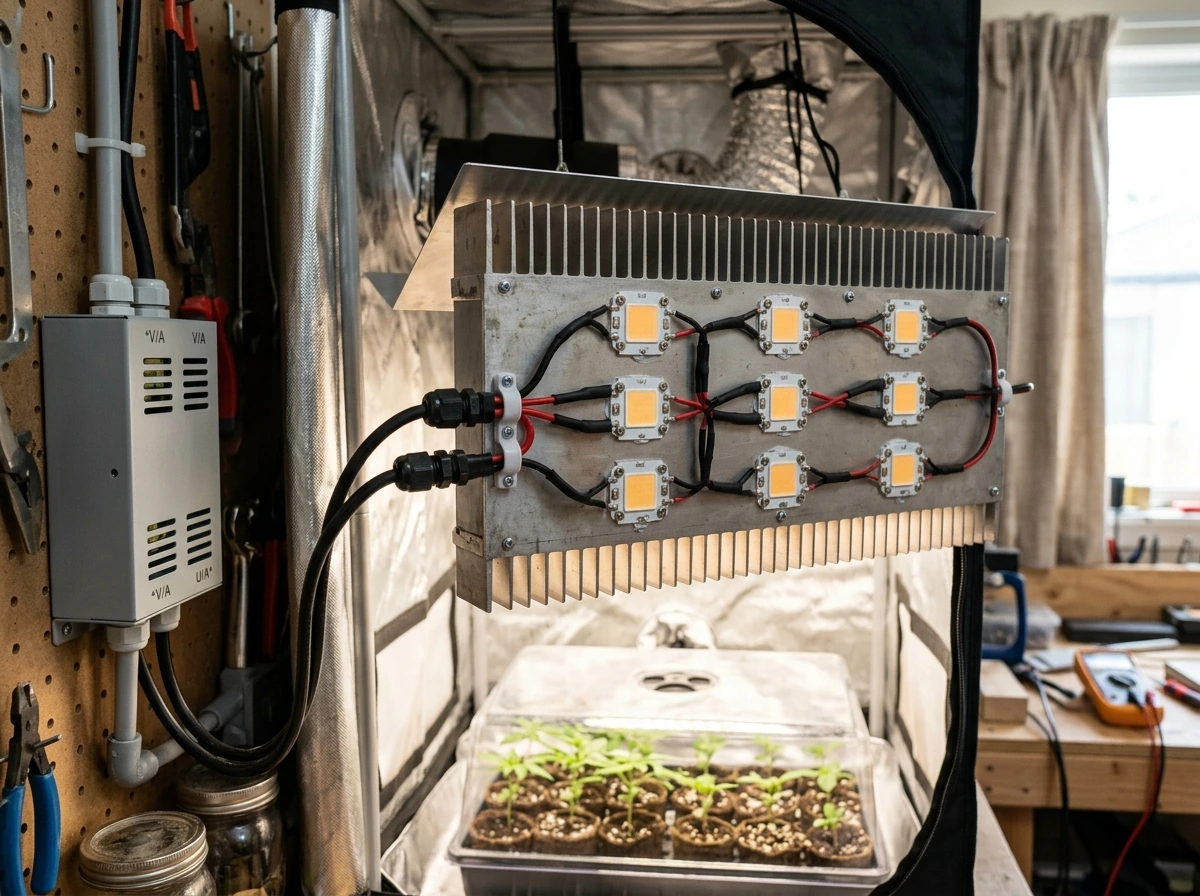
How to Build Your Own Full-Spectrum LED Grow Light
Building your own full-spectrum LED is a legitimate path, especially if you want a custom size, a specific footprint, or just enjoy the project. It's not as intimidating as it sounds if you start with quality COB (chip-on-board) LEDs or quantum board kits, which do most of the hard work for you. I'd recommend against trying to wire individual diodes from scratch unless you have electronics experience. A quantum board kit is the sweet spot for most home builders.
Parts List for a Basic DIY Full-Spectrum Quantum Board Build
| Component | What to Look For | Approximate Cost (2026) |
|---|---|---|
| Full-spectrum quantum board (e.g., Samsung LM301H or equivalent) | Full-spectrum diode mix with 660 nm red and white (2700K–3000K) diodes for broad coverage | $40–$120 depending on wattage |
| Meanwell HLG driver (or equivalent) | Match driver wattage to board; look for dimmable (Dim A/B) versions for flexibility | $30–$80 |
| Aluminum heatsink | Sized to match the board; passive heatsinks work for boards under ~200W in ventilated spaces | $15–$40 |
| Thermal paste or pad | Fills micro-gaps between board and heatsink for efficient heat transfer | $5–$10 |
| Mounting hardware (standoffs, screws) | Match to board mounting holes; M3 or M4 stainless screws | $5–$10 |
| Power cord and wiring connectors | 18 AWG minimum for connections; use proper wire nuts or lever connectors, not tape | $5–$15 |
| Hanging hardware | Adjustable rope ratchet hangers or steel wire with rated hooks | $8–$15 |
Safe Build Steps
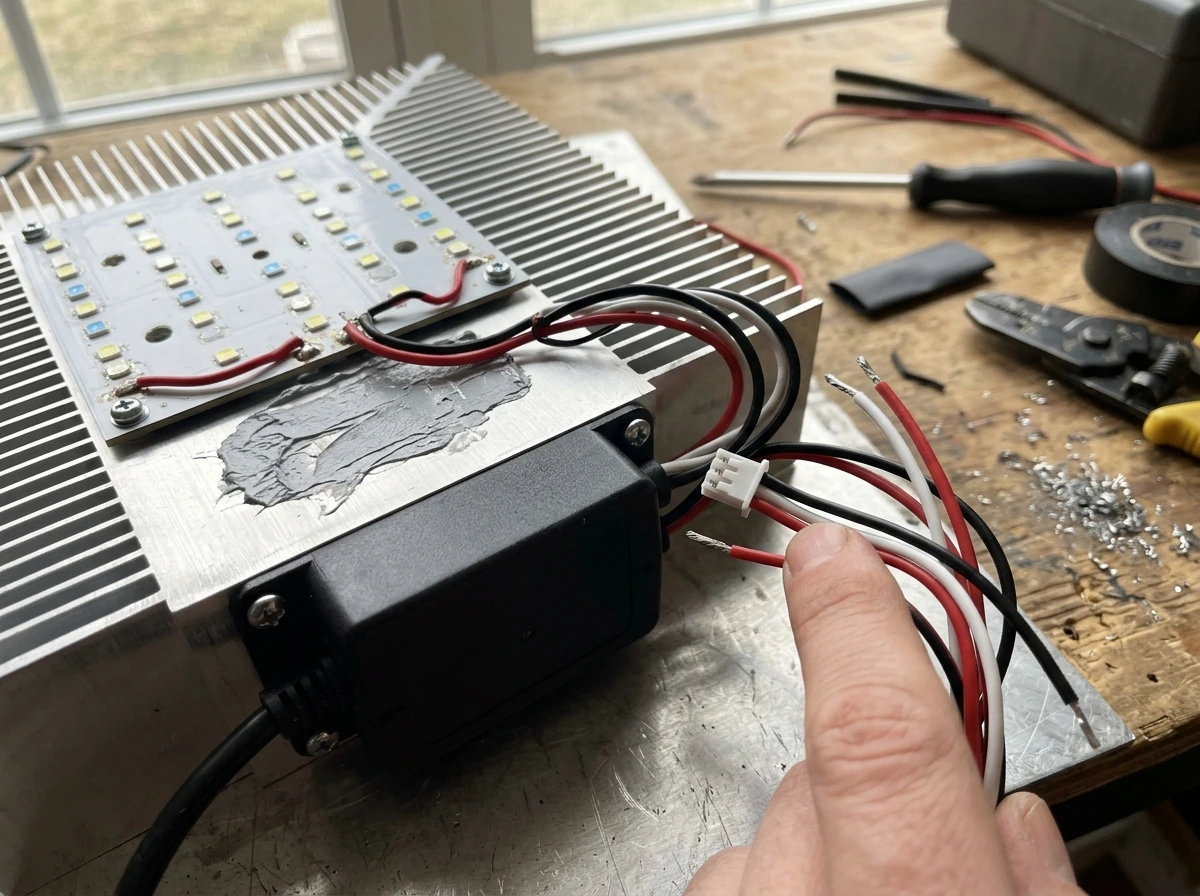
- Apply a thin, even layer of thermal paste to the back of the quantum board, then press it firmly onto the heatsink and secure with screws. Don't overtighten, just snug.
- Connect the board's positive and negative leads to the corresponding output terminals on the driver. Most quantum boards use a simple two-wire hookup with clearly labeled terminals.
- Wire the AC input side of the driver: black (hot) to L, white (neutral) to N, and green (ground) to the ground terminal. Use 18 AWG wire minimum and a proper grounded power cord.
- If your driver has a dimming port (DIM+ / DIM-), you can wire in a 100k ohm potentiometer for manual dimming control, or leave it at full output.
- Double-check all connections before plugging in. Confirm no bare wire is exposed and nothing is touching the heatsink directly.
- Plug into a GFCI outlet first for your initial test. The board should light up immediately. Check the heatsink temperature after 15–20 minutes; it should be warm but not too hot to touch briefly.
- Mount to your hanging hardware and hang at the appropriate height for your plants.
The most common mistake in DIY builds is skimping on the driver. A quality driver like the Meanwell HLG series is not negotiable if you want reliability and safety. Cheap no-name drivers run hot, fail early, and in worst cases create fire risks. The driver is not where you cut corners.
Intensity, Distance, and Coverage: Getting the Numbers Right
Coverage area is where most people get misled by marketing. A grow light advertised for a '4x4 ft coverage area' is usually referencing vegetative growth at moderate intensity, not flowering or fruiting where you need higher PPFD. For high-light plants in flower, that same 4x4 claim often realistically covers a 3x3 ft area at adequate intensity. Always size your light (or lights) for the actual growth stage you're targeting.
As a practical benchmark: seedlings need roughly 100–300 μmol·m⁻²·s⁻¹ of PPFD, leafy greens and herbs thrive at 200–400, most vegetative houseplants do well at 300–600, and flowering or fruiting plants want 600–900 or more. High-output setups for tomatoes or peppers can push 900–1200 μmol·m⁻²·s⁻¹ at peak. Start conservative and raise intensity gradually over 1–2 weeks when transitioning plants to a new light, especially a more powerful one.
If you have a dimmable light (most modern LEDs do), use that feature. Running a new seedling flat at 100% under a 300W board is a quick way to stress it. Start at 30–40% power, hang it a bit higher, then dial it up as the plant develops. This is also why dimmable DIY builds are worth the small extra cost for the potentiometer or dimmable driver.
Daily Schedules and Timing by Plant Stage
Plants don't need 24 hours of light; they actually need the dark period for certain metabolic processes. The right photoperiod depends on the type of plant and what stage it's in. Setting a timer and sticking to a consistent schedule is more important than hitting an exact number of hours. Inconsistent light cycles confuse plants, especially ones that are sensitive to photoperiod for flowering.
| Plant Stage / Type | Recommended Daily Light Hours | Notes |
|---|---|---|
| Seedlings (any species) | 16–18 hours on / 6–8 hours off | Low intensity; consistent cycle more important than duration |
| Leafy greens and herbs | 14–16 hours on / 8–10 hours off | Many are day-neutral; more hours generally means faster growth |
| Houseplants (tropical) | 12–14 hours on / 10–12 hours off | Match to their natural tropical day length for best results |
| Vegetative stage (fruiting plants) | 18 hours on / 6 hours off | More light hours drive faster vegetative growth |
| Flowering / fruiting stage | 12 hours on / 12 hours off | Critical for photoperiod-sensitive plants; triggers flowering |
| Succulents and cacti | 12–14 hours on / 10–12 hours off | High intensity but moderate duration; they don't need marathon sessions |
A plug-in outlet timer (digital is more reliable than mechanical for long-term use) is the easiest way to automate this, use it to follow the best grow light schedule. Set it once and forget it. If your light has a built-in timer, check that it holds the schedule during a power outage, because many budget units reset to 'always on' after a power interruption, which can mess up your photoperiod for sensitive plants. For more detailed timing strategies by plant type, guides focused specifically on seedling scheduling and houseplant timing go deeper on the nuances.
Fixing the Most Common Problems
Plants Are Stretching (Etiolation)
Tall, leggy stems with wide spacing between leaf nodes means the plant isn't getting enough light. Either the light is too far away, the PPFD is too low, or the photoperiod is too short, this is one of the key things to know when you’re learning how to use grow light correctly. Lower the light by 2–4 inches, check whether your timer is actually running correctly, or increase the intensity if your fixture has a dimmer. Seedlings are especially prone to stretching; if you see this in the first week, lower the light immediately before the stem gets too long to support itself.
Leaf Bleaching or Burning

White or yellow patches on the upper leaves closest to the light are a sign of light burn, and it happens when PPFD is too high at that distance. Raise the light 3–6 inches and see if new growth comes in healthy. If you recently swapped to a more powerful light without adjusting height, that's almost certainly the cause. Light burn isn't the same as nutrient burn (which shows up differently at the leaf edges), so don't chase a fertilizer fix for a placement problem.
Slow or Weak Growth Despite Running the Light
If plants look healthy but just aren't growing fast, the most common culprits are insufficient PPFD (light too far away or underpowered fixture), too few daily light hours, or a spectrum issue (some very cheap 'full spectrum' lights are heavy on wavelengths plants don't use efficiently). Check that your timer is running the full scheduled hours, lower the light to boost PPFD, and if the problem persists, consider whether your fixture's actual watt draw matches its spec.
Heat Stress and Temperature Problems
LEDs run much cooler than HID lights, but they still generate heat, and in a small enclosed space that adds up. If the canopy temperature is consistently above 85°F (29°C), you've got a heat problem regardless of what's causing it. Add a small oscillating fan for air circulation, and if you're in a tent, open the vents or add an inline exhaust fan. On DIY builds, a warm heatsink is normal but a hot heatsink means you either need a larger heatsink, better thermal paste application, or active cooling (a small computer fan attached to the heatsink does the job).
Uneven Coverage Across Your Grow Area
Plants on the edges of your footprint getting less light than center plants is a coverage issue. Either your light is too small for your space, it's hanging too high (which spreads the light thinner), or your space lacks reflective walls. Try lowering the light to concentrate more usable PPFD across the canopy, add reflective material to the walls, or supplement with a second smaller light for the edges. Rotating plants every few days also helps even out exposure if you're running one central fixture.
Glare and Eye Safety
Full-spectrum LEDs, especially those with UV output, are genuinely hard on your eyes. Never stare directly into a running grow light. If you're working in your grow space regularly, a pair of UV-blocking safety glasses designed for grow room use is a cheap and worthwhile buy. They're usually tinted amber or green and cut the harsh intensity while letting you see your plants clearly. For visitors or kids who wander in, a quick 'don't look at the light' reminder is all it takes.
FAQ
If a light claims full spectrum, do I still need to worry about PPFD?
Not necessarily. “Full spectrum” is mostly about covering a useful wavelength range, but you still need enough PPFD at the canopy, and some UV or far-red output may not be reflected in PPFD charts. If your plant is stretching or slow, fix placement and intensity first, then consider adding a supplemental light only if you are clearly short on the photons your plants need.
Should I change the light schedule when my plant moves from vegetative growth to flowering?
Yes, you should adjust the photoperiod when plants transition stages. For example, many growers keep long daylengths for vegetative growth, then shorten it for plants that require a dark period to initiate flowering. A key check is whether your specific plant is photoperiod-sensitive, because the same “full spectrum” fixture can produce different outcomes with the wrong schedule.
How can I tell whether my 200W or 300W full-spectrum light is actually strong enough?
Do not assume a “watts” number equals “brightness.” Many LEDs draw less power than their marketed equivalency and still vary widely in photon output. Use the fixture’s PPFD at your intended hanging height (from its chart) rather than relying on label watts, and if there is no chart, use a conservative start height and increase slowly while watching for burn or stretching.
What should I do if I suspect light burn but I am not sure why it is happening?
If the light is too strong at the canopy you may get bleaching, whitening, or “light burn” on the top leaves, even if the leaves look generally green at first. The practical move is to raise the light 3 to 6 inches (or reduce dimmer power) and reassess new growth over several days, because old damaged tissue will not reverse quickly.
Can I safely dim a full spectrum LED to fine-tune growth?
Yes, but only if the dimmer is real and compatible with the driver, and only if you confirm stability. Some lights can dim only to a limited range, and cheap dimmers can cause flicker or reduce output unevenly across the board. When possible, verify the light is labeled as dimmable and test power settings gradually rather than jumping from 100% to a low level.
If my plants are not growing fast, is increasing light hours the best solution?
More hours is not always better. If you extend the photoperiod beyond what your plant responds to, you can end up with weaker growth, stress, or delayed flowering for photoperiod-sensitive plants. Use a timer, then adjust daylength in small steps, especially if you are changing from an older schedule or a different light.
How do I prevent my grow light schedule from getting messed up after a power outage?
Built-in timers can be unreliable after outages, especially with budget units that reset to always-on. The simple safeguard is to keep using an external plug timer for critical photoperiods, or at least check the built-in timer behavior after any power interruption.
My seedlings are stretching, but my light is “on for the right hours.” What else should I check?
If you see leggy growth early, treat it as a height or intensity issue first, then verify the timer. Stretched plants often come from lights being too high, insufficient PPFD, or a shorter-than-expected photoperiod. Lower the light by 2 to 4 inches, confirm the timer runs the full intended schedule, then adjust intensity gradually.
Why do plants under the center of my light look better than plants at the edges?
Mixing plant heights and canopy levels matters. A single overhead fixture will deliver less PPFD to plants lower in the “shelf” and more to taller plants, which can create uneven growth across the footprint. Rotate plants every few days and, if the space is uneven, consider using a second smaller light or raising/lowering trays to keep canopies aligned.
Do I really need grow-room safety glasses if LEDs are cooler than older lamp types?
If you do not have UV-blocking eye protection, the safest approach is to avoid direct viewing and use basic shielding like safety glasses designed for grow rooms. Even though LEDs run cooler than HID lamps, the emitted intensity can still cause eye discomfort. If you work near the grow area often, protection is a worthwhile habit, not just an emergency measure.
Does “more spectrum” (extra UV or far-red) automatically improve results?
Far-red and UV can influence morphology and transitions, but they should not replace basic intensity and coverage. If your main problem is slow or weak growth, first confirm PPFD at the canopy, hanging height, and schedule. Only after those are correct should you evaluate whether the extra spectrum features are worth paying for.
Next Article
DIY Grow Light Setup: Build a Reliable Best-Result LED System
How to build a reliable diy grow light LED system with parts, wiring safety, coverage, power needs, and tuning for plant