Yes, you can absolutely build your own grow light at home, and it does not require an electrical engineering degree or a huge budget. A basic DIY LED grow light panel can be put together for $30 to $80 in parts, and a full homemade grow light system with a frame, reflector, and timer can still come in well under $150. The key is knowing which build format fits your situation, getting the wiring right so nothing burns down, Yes, you can absolutely build your own grow light at home, and it does not require an electrical engineering degree or a huge budget. A basic DIY LED grow light panel can be put together for $30 to $80 in parts, and a full homemade grow light system with a frame, reflector, and timer can still come in well under $150. The key is knowing which build format fits your situation, getting the wiring right so nothing burns down, and dialing in the right light intensity for what you are growing. This guide walks you through all of that, start to finish. This guide walks you through all of that, start to finish.
How to Build Grow Lights at Home DIY Step by Step
Pick your build format first
Before you buy a single part, decide which type of DIY grow light you are actually building. The three most common formats are a single LED panel, a full mounted grow light system, and a grow light box (sometimes called a space bucket or grow cabinet). Each has a different complexity level, cost, and use case.
DIY LED panel
This is the most beginner-friendly option. You mount one or more LED boards or LED strips onto a heatsink, wire them to a driver, and hang the whole thing above your plants. It is the fastest build, the cheapest entry point, and the easiest to troubleshoot. If you are growing seedlings or a handful of houseplants, start here.
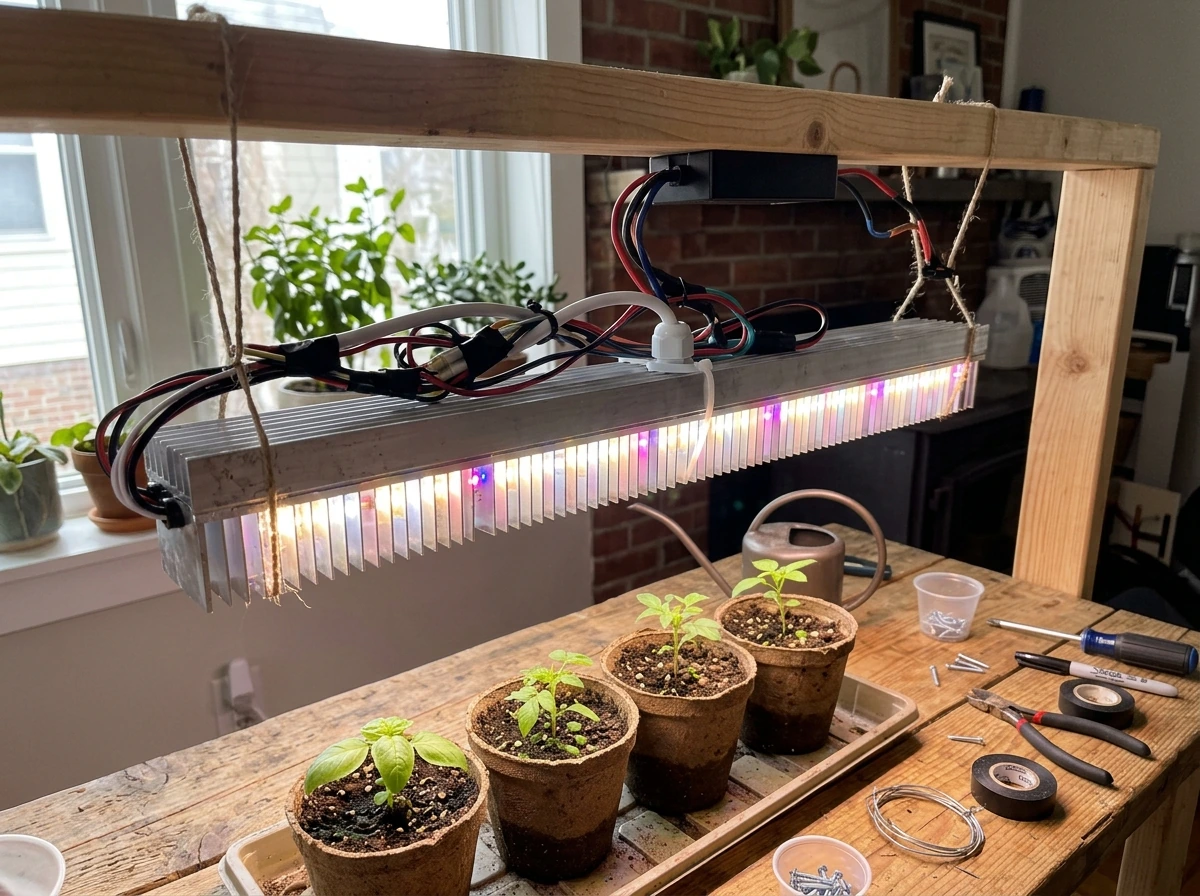
Full grow light system
A full system adds a frame or stand, a reflector or hood, a timer, and sometimes a dimmer. This is the right move if you want to cover a 2x2 ft or larger grow area, need to adjust height easily, or plan to grow in a more permanent setup. It takes a few more hours to build and costs more in hardware, but the result is a genuinely capable light that rivals commercial options at a fraction of the price.
Grow light box or grow cabinet
A grow box or space bucket is a fully enclosed grow environment where the light is built into the lid or top panel. These are great for clones, seedlings, or small plants that need a controlled environment. The build is more involved because you are also dealing with ventilation, reflective interior walls, and compact mounting. It is a satisfying project but not the right starting point if this is your first DIY build.
| Build Format | Best For | Approximate Cost | Build Complexity |
|---|---|---|---|
| DIY LED panel | Seedlings, small houseplant shelf | $30–$80 | Beginner |
| Full grow light system | Larger grow areas, veg/flower stages | $80–$150 | Intermediate |
| Grow light box / grow cabinet | Clones, seedlings, controlled environment | $50–$120+ | Intermediate to Advanced |
Parts and materials checklist
Here is what you actually need for a DIY LED grow light build. The list below covers a standard LED panel build. For a full system or grow box, add the extras listed after.
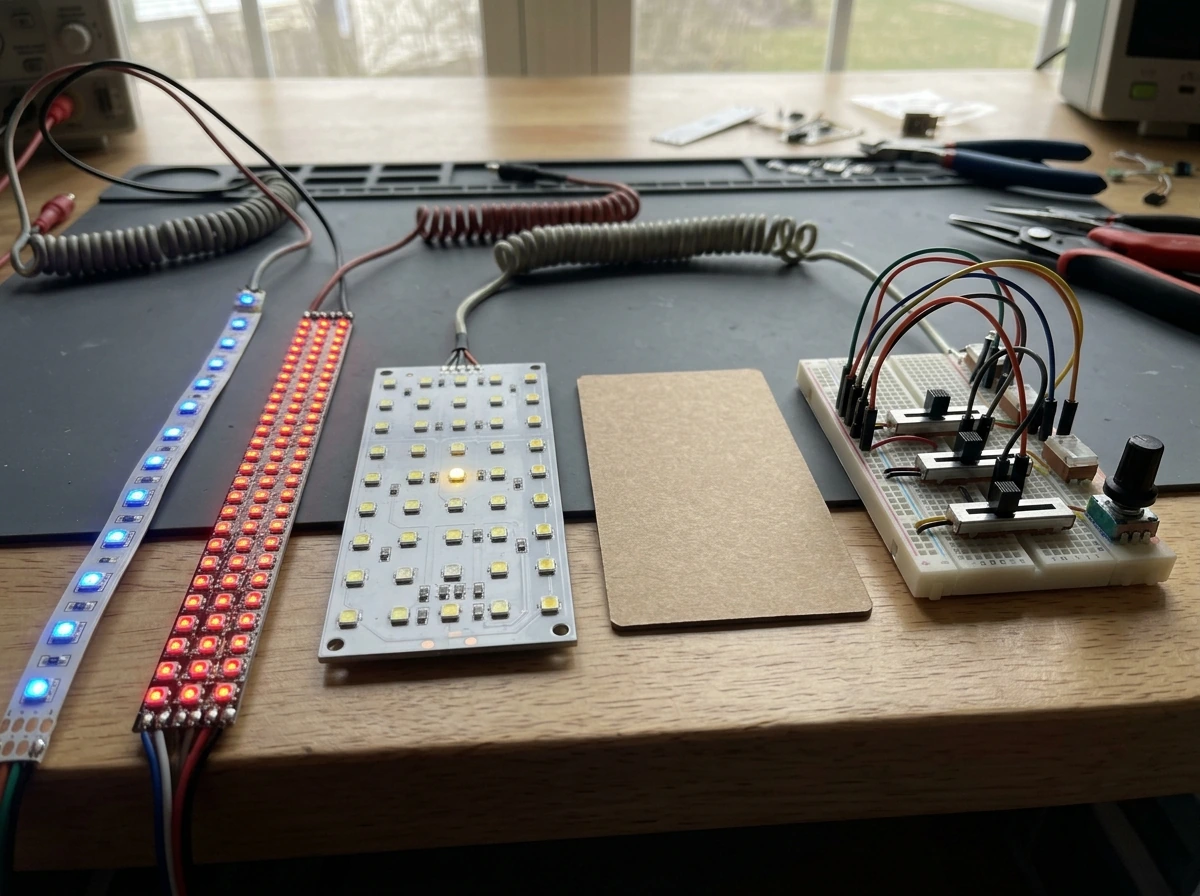
Core parts for a DIY LED panel
- LED boards or LED strip lights with full-spectrum or red/blue spectrum (more on spectrum below)
- Aluminum heatsink channel or heatsink plate sized to your LED boards
- LED driver (power supply) matched to your LED voltage and current specs
- Thermal paste or thermal adhesive tape (do not skip this)
- Mounting hardware: screws, T-slot nuts if using a channel frame, or bolts
- Wiring: appropriately rated insulated wire (18–22 AWG for most LED strip builds)
- Wire connectors or terminal blocks
- Strain relief fittings for where wires enter the enclosure or driver housing
- Power cord with plug
Additional parts for a full system or grow box
- Frame or stand: aluminum extrusion, PVC pipe, or a pre-made kit like an EZ-Connect style frame with T-slot channel
- Reflective material or Mylar sheeting for the inside of a grow box
- Mechanical timer or smart plug for automatic scheduling
- Small PC fan or inline fan for cooling (especially in a grow box)
- Zip ties, cable management clips, and a grounded power strip
On driver selection: the two types you will encounter are constant-current and constant-voltage drivers. If your LED boards have no built-in current regulation, use a constant-current driver. If your LED strips or boards already have integrated resistors or a built-in regulating circuit, use a constant-voltage driver. Mean Well is a reliable, widely available brand at most price points. Check your LED spec sheet before buying the driver, because running the wrong driver type is one of the most common beginner mistakes and can fry your LEDs.
How to build it, step by step
This step-by-step covers building a DIY LED panel, which is the foundation of every larger format. If you are building a full system or grow box, complete these steps first and then add the frame and enclosure around the finished panel.
- Plan your layout: Decide how many LED boards or strips you need based on your grow area. A rough starting rule is 30–50 watts of actual LED power per square foot for vegetative growth, and less for seedlings. Measure your shelf or grow space and sketch out where each board will sit on the heatsink.
- Prepare the heatsink: Cut or source an aluminum heatsink channel or plate to match your board layout. If using a T-slot channel frame kit, slide T-slot nuts into the channel grooves before assembling so you can bolt boards down without drilling.
- Apply thermal paste: Put a thin, even layer of thermal paste between each LED board and the heatsink surface. This is critical for heat transfer. Too little and your LEDs overheat; too much and it actually insulates instead of conducts. A rice-grain-sized amount spread thin is right.
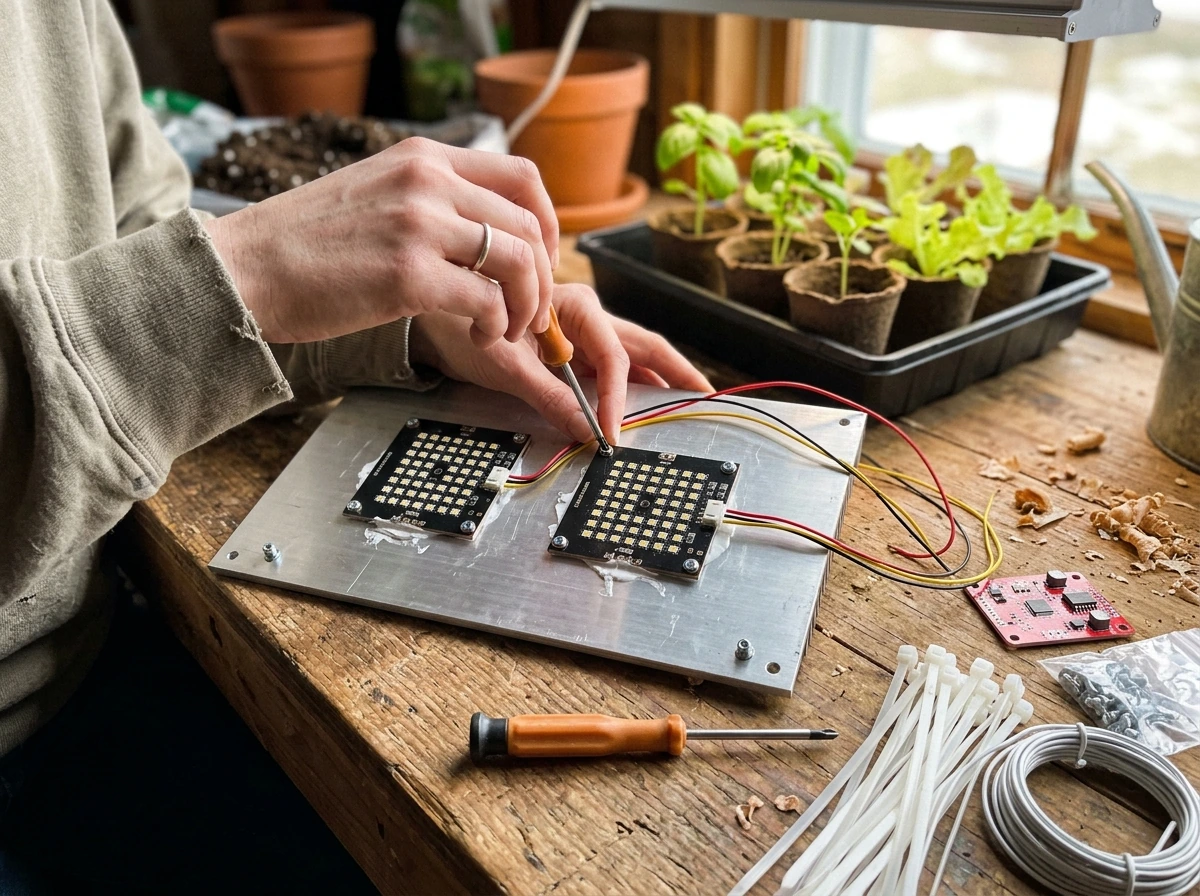
- Mount the LED boards: Press the boards onto the heatsink and secure with screws or bolts into the T-slot nuts. Tighten firmly but do not over-torque aluminum.
- Wire the LEDs to the driver: Check your driver's spec sheet for series versus parallel wiring. In a series circuit, you chain LED boards positive-to-negative end to end and the voltage adds up. In parallel, all positives connect together and all negatives connect together and the current adds up. Your driver output voltage and current rating must match your wiring configuration.
- Install strain relief: Before connecting wires to the driver, feed them through strain relief fittings at the driver housing entry point. This prevents wires from being pulled out or frayed at the connection point.
- Ground the driver: Connect the ground wire from the power cord to the driver's ground terminal and, if there is a metal enclosure or heatsink frame, bond that to ground as well.
- Connect the power cord: Bring the hot and neutral wires through a strain relief fitting into the driver input side. Connect to the labeled terminals (L for live/hot, N for neutral, and ground symbol for earth).
- Test before mounting: Plug in and confirm the LEDs light up. Check for any flickering, sections that do not light, or the driver shutting off immediately (a sign of a wiring mismatch).
- Mount and hang: Once tested, mount the panel to your frame or hanging hardware. Adjust height based on the intensity guidelines in the next section.
Wiring, safety, power, cooling, and heat
This is the part most beginner guides gloss over, but it is where DIY builds go wrong. Take it seriously and the build is genuinely safe. Rush it and you risk flickering lights, overheating drivers, or worse.
Driver and wiring safety
Always use UL-listed wire rated for the voltage and current in your build. For most DIY LED panel builds, 18 AWG wire on the output (LED) side is fine. On the input (mains) side, use 16 AWG or whatever your driver's installation instructions specify. Every wire entering or exiting an enclosure needs a strain relief fitting, not just a hole it passes through. Ground the driver to any metal housing. These are not optional steps for the perfectionist. They are what separates a safe build from a fire hazard.
Matching driver to load
If you are using a constant-current driver, you do not need additional current-balancing circuitry for the LED string. The driver handles it. If you are using a constant-voltage driver because your LED boards already have built-in regulation, the driver just needs to supply the right voltage and the boards manage their own current. The problem arises when people mix these up. Running a constant-current driver in constant-current mode with a board designed for constant-voltage (like one with built-in resistors) will push too much current through it. Some drivers have overload protection that will just shut down repeatedly. Others will let the LED burn out. Read both spec sheets before wiring.
Cooling and heat management
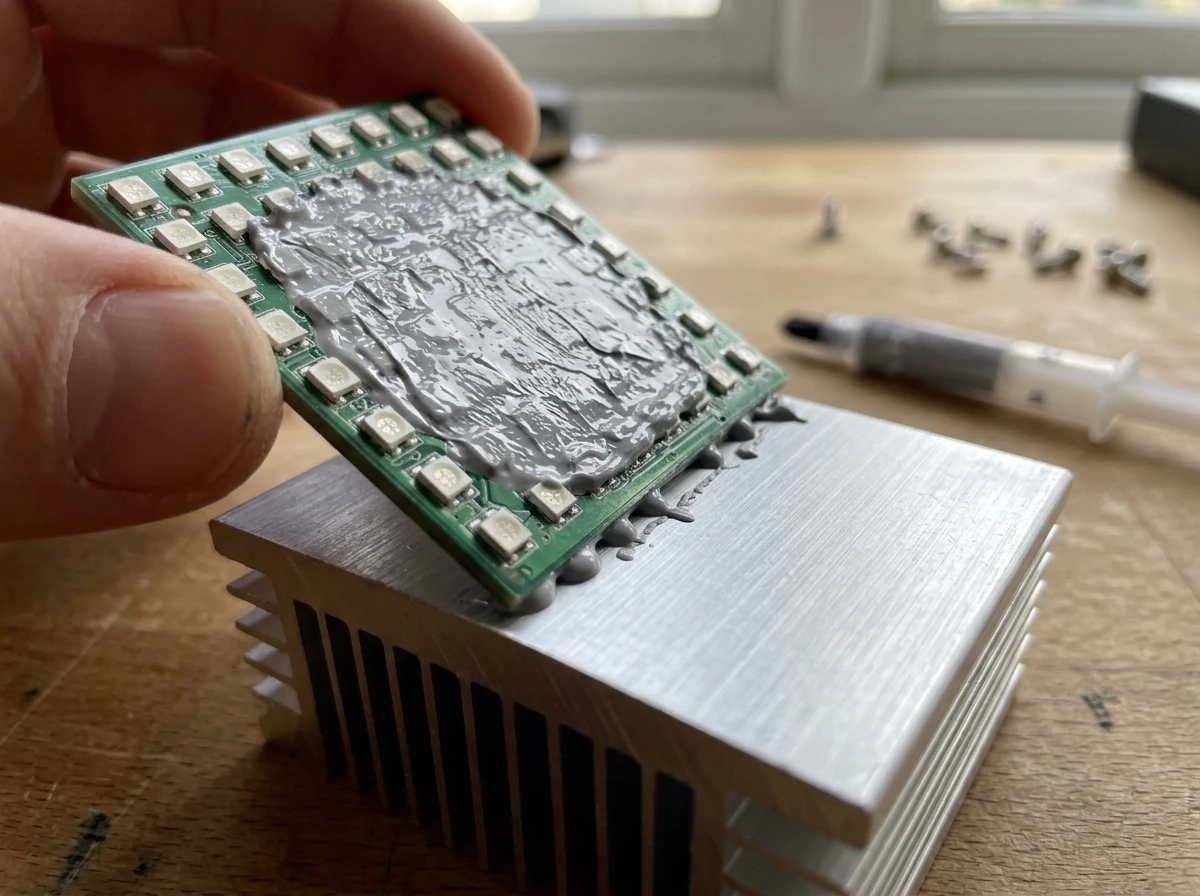
LEDs themselves are relatively cool compared to HPS or fluorescent lights, but the driver and the back of the LED boards do generate real heat. Thermal paste between the board and heatsink is non-negotiable. A practical guideline from the DIY community is to keep your heatsink surface temperature under about 145°F (63°C). If you touch the heatsink after an hour of operation and it is too hot to hold your hand on for more than a second or two, you need more heatsink mass or active cooling. In a grow box, add a small PC fan to move air across the heatsink and exhaust hot air out of the enclosure. Trapped heat kills drivers and LEDs both.
Environmental and humidity considerations
Grow environments are humid. Water and electronics do not mix. Mount your driver outside the grow space whenever possible, or in a ventilated enclosure where condensation cannot drip onto it. Keep all connections insulated and check them periodically. In a grow box, seal any cable pass-throughs with a grommet so humidity from inside cannot accumulate around the wiring.
Spectrum and intensity: what your plants actually need
Light spectrum and intensity are the two factors that determine whether your homemade grow light actually grows plants or just looks like it does. Get these right and a cheap DIY build outperforms an expensive light placed wrong.
Spectrum: what wavelengths matter
Plants primarily use blue light (around 400–500 nm, with a peak near 450 nm) and red light (around 600–700 nm, with a peak near 660 nm). Blue light drives compact, leafy vegetative growth. Red light promotes stretching, flowering, and fruiting. For seedlings and houseplants, a full-spectrum white LED is the most practical and flexible choice. Full-spectrum boards produce a broad white light that includes both blue and red wavelengths plus the green and yellow range that helps plants fill out naturally. Purpose-built red/blue LED strips (the classic purple grow lights) are cheaper but tend to produce unpleasant working conditions and make it harder to visually assess plant health.
For seedlings specifically, you want a blue-rich spectrum with blue making up roughly 20 to 30 percent of the output. Most full-spectrum white LEDs in the 3500K to 5000K color temperature range deliver this naturally without any extra tuning.
Intensity: PPFD is the number that matters
Forget watts as a measure of grow light intensity. The number that tells you whether your plants are getting enough light is PPFD, which stands for photosynthetic photon flux density, measured in micromoles per square meter per second (μmol·m⁻²·s⁻¹). Here is a practical reference table for intensity by growth stage:
| Growth Stage | Target PPFD (μmol·m⁻²·s⁻¹) | Notes |
|---|---|---|
| Germination / Seedling | 100–300 | Lower end for germination, upper end for established seedlings |
| Vegetative growth | 300–500 | Most houseplants and herbs fall here |
| Veg / Early flower | 500–800 | Higher-light crops, fruiting plants |
| Full flower / Fruiting | 700–1,200 | Not typically needed for houseplants or seedlings |
For seedlings and most houseplants, you are aiming for 100 to 300 PPFD. That is a forgiving range and easy to hit with a modest DIY LED panel. You do not need a high-powered build for this use case.
DLI: the other number worth knowing
DLI (daily light integral) is the total amount of PAR light your plants receive over a full day. It is calculated from PPFD and photoperiod hours using this formula: DLI = 0.0036 × PPFD × hours of light per day. So if your seedlings are getting 200 PPFD for 16 hours, their DLI is 0.0036 × 200 × 16 = 11.5 mol/m²/day, which is well within the healthy range for seedlings. You can tune DLI by adjusting either PPFD (height of the light) or the number of hours you run it each day.
Measuring PPFD without expensive equipment
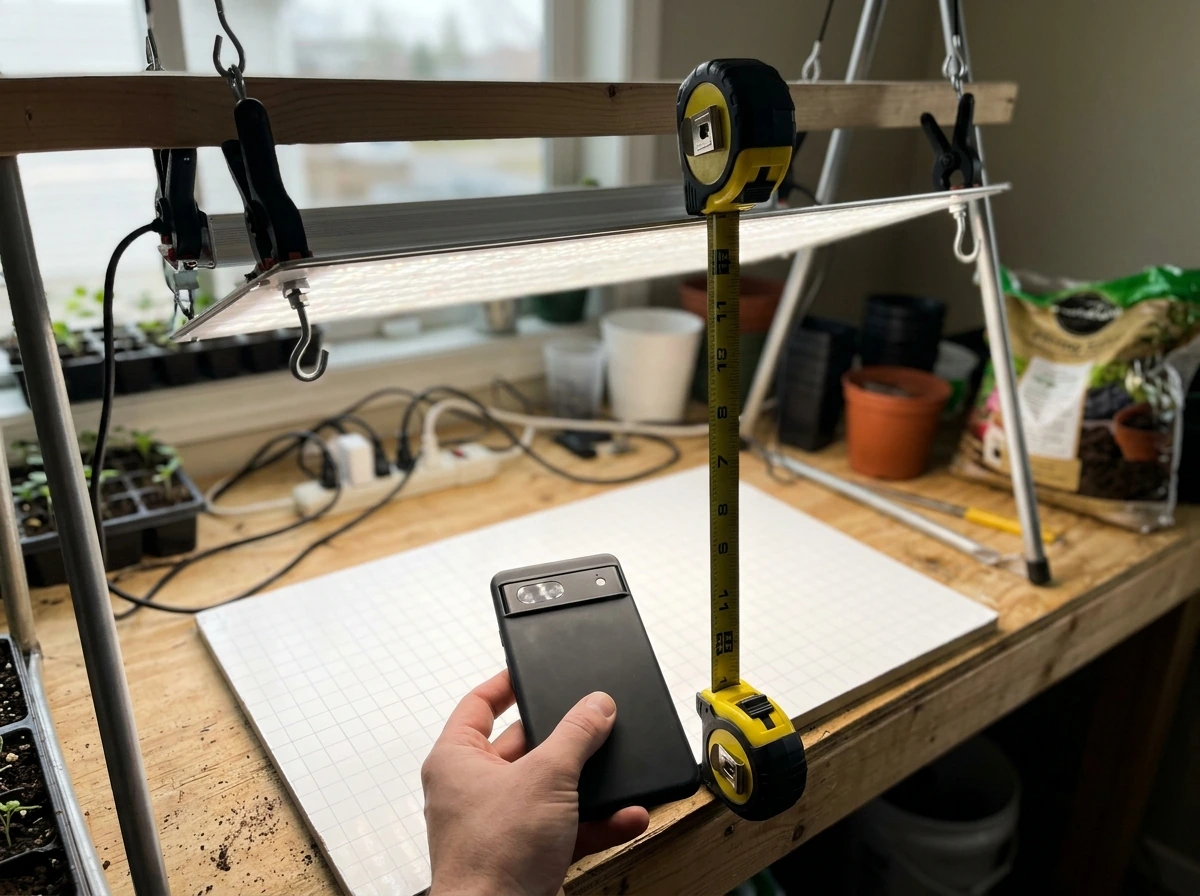
You can get a usable PPFD reading from a smartphone using an app like Photone (also known as Growlightmeter). It is not lab-grade accurate, but it is accurate enough to tell you whether you are in the ballpark for your target stage. Use it to check intensity at canopy level and adjust light height accordingly.
Mounting and placement for seedlings and houseplants
Where you hang the light matters as much as what the light is. Too close and you bleach or stress plants. Too far and they stretch, get leggy, and fail to thrive.
Starting heights
For seedlings and early vegetative growth, start with your DIY LED panel about 18 to 24 inches above the canopy. This is a safe starting point for most panel builds in the 30 to 60 watt actual power range. From there, use your PPFD app to check the reading at canopy level. If you are getting more than 300 PPFD for seedlings, raise the light. If you are getting less than 100, lower it or verify your wiring delivered the expected output.
Signs of too much or too little light
- Too close / too intense: Pale or bleached leaf tips, leaves curling upward, yellowing at the top of the plant while lower leaves stay green
- Too far / too dim: Leggy stretching toward the light, thin weak stems, slow growth, deep green but elongated leaves
- Uneven coverage: One side of the tray growing faster, plants at the edges leaning toward the center, inconsistent germination rates
Coverage area
A single DIY LED panel with two to four LED boards will typically cover a 1x2 ft to 2x2 ft area at seedling-appropriate intensity when hung 18 to 24 inches up. For larger shelves or a 4-foot propagation tray, you either need a longer strip layout (multiple boards in a row) or two separate panels. Do not try to stretch one small panel over too large an area by raising it higher. You will lose intensity faster than you gain coverage.
If you are mounting in a grow box, reflective Mylar on the walls will significantly improve light distribution and make your panel more efficient without adding any wattage. In a typical small grow box, Mylar can improve effective light delivery by 20 to 30 percent compared to bare walls.
Light schedules and fixing common DIY problems
Operating schedules
Plants need a dark period. Contrary to the instinct to just run lights 24 hours, most plants do not thrive under continuous light. For seedlings, 16 to 18 hours of light and 6 to 8 hours of darkness is a reliable starting schedule. For established houseplants, 12 to 16 hours works well depending on the species. Use a simple mechanical outlet timer or a smart plug to automate this. Consistency matters more than the exact number of hours. A timer that cycles on and off reliably every day is better than manual switching that drifts.
You can use the DLI formula to decide whether to run shorter days at higher intensity or longer days at lower intensity. For example, if your panel only delivers 150 PPFD at safe hanging height, running it for 18 hours gives a DLI of about 9.7 mol/m²/day, which is fine for seedlings. If you dial it up to 200 PPFD, you can run 16 hours and land at about 11.5 DLI. Either approach works.
Troubleshooting common DIY grow light problems
Here are the problems that come up most often in homemade builds, and how to fix them.
| Problem | Likely Cause | Fix |
|---|---|---|
| Light flickers or shuts off | Driver overload, wiring mismatch, or thermal shutdown | Check that driver output matches LED load; verify series/parallel wiring is correct; ensure driver has adequate ventilation |
| Uneven light across canopy | Single panel too far off-center, or panel too small for the area | Add a second panel, reposition to center, or add Mylar reflectors on side walls |
| Insufficient intensity (plants stretching) | Panel too far away, underpowered build, or incorrect driver output | Lower the panel, verify driver is delivering rated current, measure PPFD and compare to target |
| Overheating (driver or heatsink too hot) | Inadequate heatsink mass, poor thermal paste contact, or no airflow | Add a small fan, verify thermal paste is applied correctly, check heatsink stays below 145°F/63°C |
| Wrong spectrum (plants not thriving) | Using only warm white LEDs (heavy red) with no blue, or using purely blue LEDs | Switch to a full-spectrum board in the 3500K–5000K range or add a blue-rich strip to an existing warm white setup |
| LEDs do not light up at all | Polarity reversed, loose terminal connection, or blown driver | Recheck positive/negative connections at both driver output and LED input; test driver output voltage with a multimeter |
| Sections of strip not lighting | Cold solder joint or damaged strip segment at a cut point | Re-solder or re-connect at the cut, or replace the damaged strip segment |
A note on iteration
Your first DIY grow light build will probably need at least one adjustment after you see how plants respond to it. That is completely normal and it does not mean you did something wrong. The combination of measuring PPFD at canopy level, watching plant response over the first two weeks, and tweaking height or schedule based on what you see is how every experienced grower dials in a new setup. Give it two weeks before making major changes, keep notes on what you adjusted and when, and you will have a dialed-in homemade grow light that genuinely works.
Once you are comfortable with a basic panel build, the natural next steps are designing a proper grow light stand for adjustable height (useful for plants at different growth stages), Once you are comfortable with a basic panel build, the natural next steps are designing a proper grow light stand for adjustable height (useful for plants at different growth stages), exploring quantum board builds for a significant efficiency upgrade, or thinking about a full DIY grow light setup that covers a dedicated growing area., or thinking about a full DIY grow light setup that covers a dedicated growing area. Each of those builds follows the same core principles you just learned here.
FAQ
How can I make a DIY grow light safer inside a humid grow box (condensation risk)?
Use a grounded driver and route the mains side through a proper enclosure (or mount it fully outside the grow space). Add a strain relief at every cable entry, and keep the driver wiring away from places where condensation could pool. If your grow box has reflective walls, avoid any exposed metal contact between the driver housing and the light mounts.
What should I check first if my DIY grow light flickers or the driver keeps shutting down?
If the LEDs are mounted on a heatsink and you see the driver repeatedly cycling on/off, double-check driver type and wiring polarity before changing anything else. Constant-current drivers should go to the LED string, constant-voltage drivers to boards that specify their rated voltage. Also verify the total number of boards/LEDs matches what the driver can support at its rated output.
How do I know whether my LED boards want a constant-voltage or constant-current driver when the kit specs are unclear?
Don’t rely on the LED “voltage” listed in a kit. Verify whether your specific LEDs are specified for constant-voltage or constant-current operation, then confirm the driver output range supports your series count. If you are using multiple boards, test each string/section for continuity and correct series wiring before energizing.
Is checking heatsink temperature enough, or how do I decide whether I need more cooling?
Heatsink temperature is useful, but the more important metric is the actual thermal behavior under your real mounting and airflow. Measure after your planned photoperiod, not just after 5 minutes, and compare to your comfortable “hold with a bare hand” threshold. If it runs too hot, increase heatsink mass, improve contact (thermal paste), or add a small fan that runs continuously during light hours.
Can I cover a larger grow area by raising a small DIY panel higher?
A single small panel can be used for a larger area only if you accept lower PPFD at the edges. Instead of raising the panel higher, add a second panel or redesign with a longer strip layout that covers your tray while keeping canopy height in the target range. This prevents stretching the setup in a way that reduces light where plants need it most.
Can I add a dimmer to a DIY LED grow light, and will any dimmer work?
Yes, but only if your driver supports dimming and you wire the dimming method correctly (some drivers use a dedicated control input, others are not compatible with simple resistor changes). If your driver does not list a dimming option, keep wiring as specified and adjust intensity by changing distance (height) or photoperiod instead.
When do I need current-balancing or matching components in a DIY grow light, if at all?
For constant-current systems, you usually do not add balancing circuitry for the LED string, but you must keep series counts and wiring identical across channels. For constant-voltage boards, make sure each board is truly designed to run at the driver’s rated voltage. Mixing board types within the same channel can lead to uneven current sharing.
What’s the best way to troubleshoot PPFD that is too high or too low for seedlings?
Start with your seedlings target schedule and adjust using PPFD readings at canopy level. If you get above 300 PPFD, raise the light, then re-check. If you get below 100 PPFD, lower the light or verify wiring output. Don’t immediately “fix” low PPFD by lengthening hours, because heat buildup and DLI changes can push you beyond safe operating conditions for the driver and LEDs.
How accurate is a smartphone PPFD app, and how should I use it to adjust placement?
A quick smartphone reading is a starting point, but phone apps can drift with camera settings and measurement angles. Measure at the canopy height at the center and near the corners, then use consistency over time to dial in changes. If readings vary wildly across the tray, improve reflector coverage or reposition the panel rather than changing spectrum.
How should I decide how many panels I need to get even light distribution across shelves or a tray?
Plan for more than “enough light,” because coverage often changes with plant height and canopy shape. Use the PPFD app to map the area, then choose whether to add panels or adjust arrangement so the lowest-value points still meet your stage target. Most DIY setups fail when only the center meets PPFD and edges become too dim.
What timer setup should I use, and is it okay to switch grow lights multiple times per day?
Yes, but only within safe electrical practices. Use a timer rated for the current draw of your driver and confirm the driver can tolerate frequent power cycling without exceeding its listed limits. Mechanical outlet timers are fine, but smart plugs should be chosen for continuous daily cycling and adequate power rating.
My plants look leggy or stressed, how do I tell whether it’s height, spectrum, or timing?
If your plants stretch, it often means intensity is too low or the light is too far away. If they look stressed with pale, scorched, or bleached tops, it usually means too much intensity or the light is too close (or concentrated due to reflectors). Change only one variable at a time, height first, then photoperiod, and wait about 10 to 14 days to judge the effect.
What’s the right way to route and seal cables where they enter a grow box?
If you must seal pass-throughs, use grommets sized to the cable so the jacket is protected and not pinched. Avoid raw gaps around the cable where humid air can migrate and condense on cable insulation. Also route cables so the lowest point does not form a drip trap.
When Should I Turn My Grow Light to 100%? Rules for Timing
Rules for when to run a grow light at 100%, using PPFD, distance, dimming, and daily schedules to avoid stress.
